


Dropper posts, like any moving part on your bike, need occasional maintenance to keep them performing at their best. We designed our droppers to be serviceable at home with minimal mechanical experience and no proprietary tools needed. To fully service your post, some basic tools are required… and about 15-20 minutes of your precious time.
WHY DOES MY DROPPER POST NEED SERVICE?
The dust wiper, which prevents dirt from contaminating the internal grease, can become dry and sticky over time due to dust from trails or excessive cleaning with a degreaser. If the seal has not been kept clean and lubed up, it can allow dirt and grit to make their way into the internals, which can also make it slow and gritty. All of those factors will cause your dropper to be slow like molasses.
WHEN DOES MY DROPPER POST NEED SERVICE?
It will tell you when it needs to be loved. If the post is getting slow to raise, stiff to lower, or sounds funky, that is your dropper saying it needs some attention for all those hours it went up and down to keep a smile on your face. You can do this service as you see fit. It's a great idea to service your dropper at the beginning or end of your main riding season, or after about 6-8 months/50 hours of regular use. If you want your dropper post to feel like new, and you ride a lot – especially in wet months or super dusty trails, then maybe every few months is better for you, or even sooner if your OCD deems it. It is recommended that you at least stick to a once-a-year minimum so that the internals get checked before they need to be replaced.
FIRST THINGS FIRST
Put on some tunes, grab a tasty bevie and a moral support buddy (human, canine, feline, any breathing creature who won’t trash talk you every time you drop a wrench), and let’s tear it apart.
MODELS
-
Rainier *all generations except Gen 1
-
Bachelor
-
Loam
-
Coast Internal *Do not let the air out for service
Necessary Tools/Materials
-
High viscosity lubricant
-
We recommend PNW Gold Grease, but if you have Slickoleum, SRAM Butter, or Buzzy’s Slick Honey, those all do great. Try to stay away from Park Tool PPL Grease or any generic thick bearing/assembly grease
-
Rubbing alcohol
-
Adjustable wrench
-
2mm hex key
-
3mm hex key
-
5mm hex key
-
A clean rag (microfiber preferred)
-
Painter’s tape or electrical tape for marking your saddle position and seat height
-
High-pressure shock pump (if dropper has tunable air cartridge)
Let’s Do Some Maintenance
We need to get the dropper out of the bike first. Your bike may be straightforward or it may not. If you are unsure about this, we suggest recruiting the help of a riding buddy who has done it before.
PRO TIP: When taking the post apart, it will help out if you lay out all the parts in the same orientation they are on the post on your workbench. That way you won’t lose anything to the garage goblins or forget which order they go in.
Step 1: Dropper Removal
-
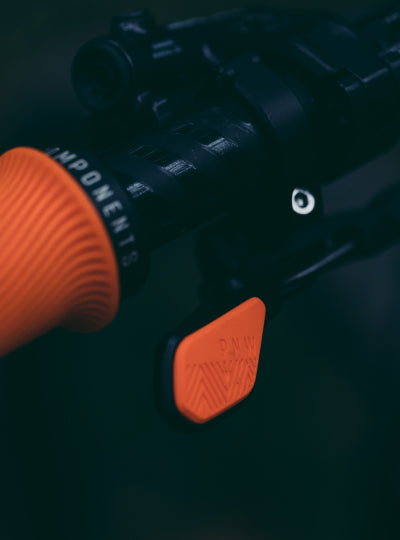
Start by taking the dropper lever off of your handlebar. Don’t take the cable off the lever unless you need to for your bike, most installations can be done by leaving the lever and cable connected, simply removed from the bars, giving you some slack in your housing.
-
Clip any cable ties off so you can have the housing free to slide into your frame. **Think of the dropper, cables, and lever as one long part that you floss your frame with.
-
Mark your saddle height with the tape so you know where to set it when re-installing it
-
Loosen your seat collar and slide the dropper post out of the seat tube while feeding the cable housing at the front of the frame at the same rate you are pulling the post out. Pay attention to potentially snagging the housing in the frame and don’t force it too much, or you may damage your housing.
-
With the housing exposed at the bottom of the dropper, pull down on it below the actuator. That will actuate the dropper so be sure it is already extended.
-
Now you can slide the cable head, or barrel nut if you have one, out of the actuator cable cradle. As seen here.
-
Leave the housing as is so you can easily re-connect once done
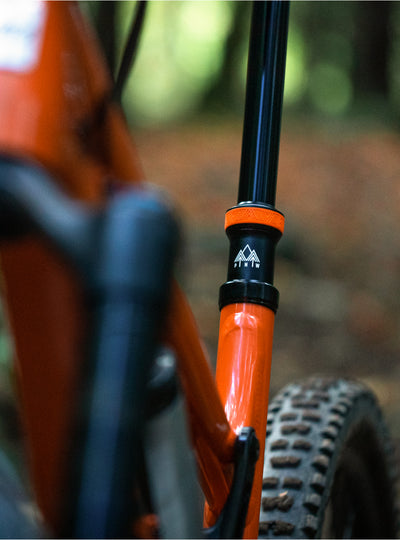
Step 2: Mid Cap Removal
-
With the dropper out of the bike, unthread the mid cap and slide it up the dropper post’s stanchion towards the seat post head.
-
Leave the bushing in place
Step 3: Actuator Removal
-
With the adjustable wrench, you will unscrew the actuator at the bottom of the post.
-
With the post in one hand, hold the post upside down and use the other hand to turn the wrench on the actuator counterclockwise.
-
NOTE: Be sure you have a secure connection on the actuator before you start unscrewing, or you can damage the actuator.
-
If the actuator is really hard to move, there may be some corrosion, or the thread locker is doing too good of a job.
-
If you see corrosion, hit it with some penetrating lube and let it sit for a bit to loosen up.
-
If you have a strap wrench, that can help as well if it is finicky and hard to remove.
-
Once loose, unthread the actuator entirely and pull it out of the lower tube by roughly 1” (20mm).
- With the 2mm hex key remove the thru-bolts that hold the actuator to the lower cartridge shaft. Like this
- Remove the actuator and rubber washer from the cartridge shaft and keep the 2 set screws in a safe place.See here.
Step 4: Dropper Disassembly Clean and Grease
-
Pull the post apart by pulling the lower tube down and away from the dropper post’s mid cap. If your post has travel adjust, remove the travel adjust bushing. Shown here.
• NOTE: If the actuator rod falls out of the dropper post cartridge no need to worry as it can be replaced at any time before assembling the post with the actuator. Be sure to orient the flat end of the actuator rod into the dropper post, leaving the rounded end exposed to contact the actuator on the bottom of the dropper -
Clean off the old grease and dirt by using rubbing alcohol applied to your rag, clean the dropper’s upper stanchion, brass keys, machined grooves, bushing/s, mid cap seal, threads on mid cap, threads on lower tube and the inside of the lower tubing.
-
Apply a thin layer of grease to the brass keys and machined grooves inside the post.
• PRO TIP: If the keys fall out easily, simply apply some grease to them and they will stick to the machined groove while you put the post together -
If your dust wiper in the mid cap is dirty and dry, be sure to take a little extra care to clean it up nicely, then massage some grease into the seal on the inside lips and the outer lip. Clean off any excess grease on the threads of the mid cap
-
Apply a thin layer of grease to the bushings
-
NOTE: Check the cartridge retaining nut in the saddle head to see if it’s loose. If loose, rotate it clockwise to tighten it. If it spins freely, slide a flathead screwdriver in between the cartridge and the upper stanchion's inner wall. Add a slight twist on the screwdriver to apply pressure to the cartridge. Now you can tighten up the top bolt.
STEP 5: DROPPER ASSEMBLY
-
If your post has travel adjust, replace the travel adjust bushing first. Align the brass keys with the machined grooves and slide the uppers and lowers of the dropper post together. An easy way to make sure the post is sliding back together properly is to make sure the saddle clamp head is pointed forward along with the PNW logo on the front of the post. As seen here.
• PRO TIP: If your post had any rattle before service, you will want to replace your brass keys and or add a thin strip of electrical tape to the cartridge to buffer it from the walls of the upper stanchion. This step may require removing the cartridge if you choose to do so. -
Replace the rubber washer, followed by the actuator onto the lower shaft of the cartridge.
-
Align the bolt holes in the threads of the actuator with the machined grooves on the bottom of the cartridge shaft. Slide the thru-bolts in and use a 2mm hex key to tighten them snugly.
- Reinstall the actuator assembly by threading it into the lower post body and use the adjustable wrench to tighten it into place. Just tighten it until it’s snug, there’s no need to overtorque the actuator.
- Seat the upper bushing in the correct orientation into the top of the lower tube.
- Now you can slide the mid cap downwards and thread it back onto the lower post body until its hand-tight. Be sure to clean off any excess grease on the threads of the lower tube before you thread it back down
STEP 6: CHECK THE AIR IN THE CARTRIDGE WITH A SHOCK PUMP
** Only applies to the Loam Dropper V1 or Bachelor V2 dropper
-
Mark your saddle position for/aft with a sharpie on the rails or painter's tape
-
Mark your saddle angle with a silver Sharpie or painter's tape.
• PRO TIP: If you have a level meter in your phone you can use that to measure when the bike is together. -
Remove the saddle from the dropper post with a 5mm kex key.
• PRO TIP: Loosen the front bolt, then remove the rear bolt leaving the saddle clamp attached to the seatpost to make it easier to put back on. -
Unscrew or remove the valve cap at the top of the dropper under the saddle clamps.
-
With a high-pressure shock pump, fill the air cartridge to your preferred pressure while the dropper post is fully extended, making sure not to exceed 300 psi, as that can potentially cause premature air loss in the cartridge.
-
Now you can re-attach your saddle, and install your dropper post into your bike! Woohoo!
If you need any spare parts that you have found to be worn out and need to be replaced we have those located in our Parts And Service section that you can order anytime.
Models included
-
Pine
-
Cascade
-
Fern
-
Coast External *Do not let the air out for service
Necessary Tools/Materials
-
High viscosity lubricant
-
We recommend PNW Gold Grease, but if you have Slickoleum, SRAM Butter, or Buzzy’s Slick Honey, those all do great. Try to stay away from Park Tool PPL Grease or any generic thick bearing/assembly grease
-
Rubbing alcohol
-
Adjustable wrench
-
2mm hex key
-
3mm hex key
-
5mm hex key
-
5/16 wrench
-
Needle nose pliers
-
A clean rag (microfiber preferred)
-
Painter’s tape or electrical tape for marking your saddle position and seat height
-
High-pressure shock pump (if you have a Coast dropper)
Let’s Do Some Maintenance
We need to get the dropper out of the bike first. Your bike may be straightforward or it may not. If you are unsure about this, we suggest recruiting the help of a riding buddy who has done it before.
PRO TIP: When taking the post apart, it will help out if you lay out all the parts in the same orientation they are on the post on your workbench. That way you won’t lose anything to the garage goblins or forget which order they go in.
Step 1: Dropper Removal
-
Start by making sure you have some slack in your housing so you can detach the cable from the dropper easily. Don’t take the cable off the lever unless you need to for your bike, most installations can be done by just leaving the lever and cable connected.
-
Clip any cable ties off near the dropper so you can remove the housing from the actuator arm on the dropper
-
Pull off the dust cover on the actuator arm by pulling from the bottom outwardly. Like this.
-
Gently pull down on the housing to unseat it from the actuator cradle.
-
Slip the cable head out of the cable cradle and pull the cable/housing away from the dropper.
-
Mark your saddle height with the tape so you know where to set it when re-installing it.
-
Loosen your seat collar and slide the dropper post out of the seat tube.
-
Leave the housing as is so you can easily re-connect once done.
Step 2: Dropper Disassembly Clean and Grease
-
With the adjustable wrench, remove the lower cap of the post using the flat slots on the base cap. Seen here.
-
Take the post in one hand, hold the post upside down and use the other hand to turn the wrench on the base cap counterclockwise. Once it’s broken free, unthread and remove the lower cap entirely.
-
With the 5/16th wrench loosen the locknut holding the nylon cable and pull the nylon cable through the hole in the bolt. Like this.
-
Now you will need to remove the mid cap. Look for a 2.5mm hex bolt either on the opposite side of the actuator arm of the mid cap or under the cable carrier in the actuator arm, slightly hidden. Use the 2.5mm hex key to remove the set screw and set it aside for safekeeping.
-
With the set screw removed from the mid cap you can now slide the entire mid-cap assembly up the stanchion toward the head of the post. Be sure to slide it all the way up so it is out of the way for the next step.
-
Next, slide the lower post body towards the head of the dropper to reveal the actuator, nylon cable and lower cartridge shaft. Watch how.
-
Take the 2mm hex key to remove the lower assembly thru-bolt and set it aside safely. Be sure to put it in a spot that it will not roll away and get lost. See here.
-
Now you can remove the lower assembly and bottom-out bumpers, set them aside in the same orientation as they were on the post on your workbench.
-
Slide the lower tube off the upper stanchion, separating the post into two halves.
• NOTE: If the actuator rod falls out of the dropper post cartridge no need to worry as it can be replaced at any time before re-securing the nylon cord. Be sure to orient the flat end of the actuator rod into the dropper post, leaving the rounded end exposed to contact the actuator on the bottom of the dropper. -
Locate the upper roller pin that looks like a silver grain of rice and set it aside for safekeeping.
• NOTE: Be sure to not lose that little guy or the post will not work once put back together. -
Now you will clean off the old grease and dirt by applying rubbing alcohol to your rag and cleaning the dropper’s upper stanchion, brass keys, machined grooves, bushings, mid cap seal, threads on mid cap, threads on the lower tube and the inside of the lower tubing.
-
Apply a thin layer of grease to the brass keys and machined grooves inside the post.
• PRO TIP: If the keys fall out easily, simply apply some grease to them and they will stick to the machined groove while you put the post together -
If your dust wiper in the mid cap is dirty and dry, be sure to take a little extra care to clean it up nicely, then massage some grease into the seal on the inside lips and the outer lip.
-
Apply a thin layer of grease to the bushings
Step 3: Dropper Assembly
- First, run the nylon cord vertically along the dropper post body, aligning it between the two brass keys. Like this. Wrap the nylon cord around the lower shaft to help guide it through the post body easily.
• NOTE: Make sure the nylon cord runs through the grooves of both plastic spacers or the post will not go together or you can risk damaging the cable. -
To align the lower assembly with the upper assembly, make sure the logo is pointing in the same direction as the saddle head.
- Now you can put the upper portion of the dropper back into the lower tube.
-
Slide the post together all the way to the saddle clamp, this should be one easy motion. If you feel the post jamming when sliding it together, make sure to stop and realign the nylon cord. Do not force this step.
-
Place the upper roller pin at the mid cap slot, making sure it is firmly seated. You can apply a small amount of grease to hold it in place. Like this.
-
Slide the mid cap down and align the threaded hole in the mid cap with the machined indent in the dropper post.
-
Reinstall the mid cap screw with the 2.5mm hex key. This is a set screw so you only need to get it snug.
• NOTE: Double-check that the roller pin is still in place by looking for a shiny object tucked behind the cable carrier. If it is not, slide it back into position to keep the nylon cable from getting cut. -
Start to unwrap the nylon cable from the cartridge shaft.
-
Install the bottom-out bumper on the cartridge shaft, followed by the lower post tube assembly
-
Now you can install the lower assembly thru-bolt. Pay attention that it lines up with the machined groove in the lower assembly.
-
Align the metal actuator arm on the lower assembly with the mid cap so that the nylon cable travels straight from the dust cap and through the post to the lower assembly arm.
• NOTE: Do not put the nylon cord behind this metal bar as the metal bar acts as a second roller pin. The nylon cord should not be wrapped around anything at this point. -
Now you can slide the lower assembly into the low post tube until it is flush with the bottom of the tube. Hold the nylon cable in your hand while doing so and be sure there is no slack in the cable while seating the assembly.
-
Thread the nylon cable through the hole in the actuator bolt and pull it taut.
• NOTE: If the lower assembly is not sitting flush with the lower tube, you will not be able to get the cable tension sitting right. -
Use pliers to hold the cable taut while you tighten the lock nut with the 5/16th wrench to hold the cable in place. Pay attention to not pull the cable too tight, you just want it to be taught with no slack. Watch here.
-
NOTE: If your cartridge is overextended it will push the lower assembly away from the lower tube and can cause your dropper post to sag.
-
If you have a dropper that is longer than 125mm, you will need to drop/compress your dropper by about 20mm in order to do the following procedure
-
With your index finger, push and hold the lower assembly arm into the actuator rod while simultaneously pushing the lower assembly towards the post with your thumbs. You are essentially compressing the assembly into the lower tube.
-
Release the lower assembly arm while still applying pressure with your thumbs. Once the lower assembly is no longer pushing on the actuator rod you can stop applying pressure with your thumbs.
-
-
Wrap the loose end of the nylon cable around the actuator arm bolt and thread the lower cap back onto the dropper post. You can leave some of the end or you can trim it, but it is better to leave some length on the end of the cable so you can re-tension the cable if needed
-
Test the dropper actuation by hand, or if needed use a tool to depress the cable carrier in the actuator arm (at the top) to activate the dropper. If the post works normally continue, if there is too much slack and it does not return normally you will need to re-tension the nylon cable so it will activate correctly
-
Install the lower cap with your adjustable wrench. Just get it tight till it stops, you don’t want to overtighten the cap.
-
Celebrate with your buddy or favorite beverage of choice and go for a ride!
If you need any spare parts that you have found to be worn out and need to be replaced we have those located in our Parts And Service section that you can order anytime.
As always, if you have any questions or need help with re-installation, feel free to contact our Rider Support Team at: info@pnwcomponents.com and they’ll get you back on the bike in no time.